CAGED Guitar System
The CAGED Guitar System Explained
The CAGED guitar system can be very useful to help you
find your way around the fretboard. The idea is based on the
relationship between common major chord and major scale shapes. It is
also a very useful method for visualising chord tones across the neck of
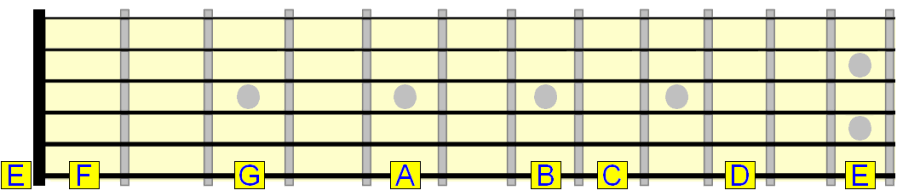
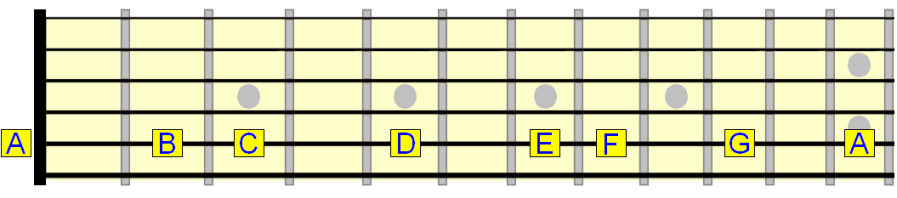
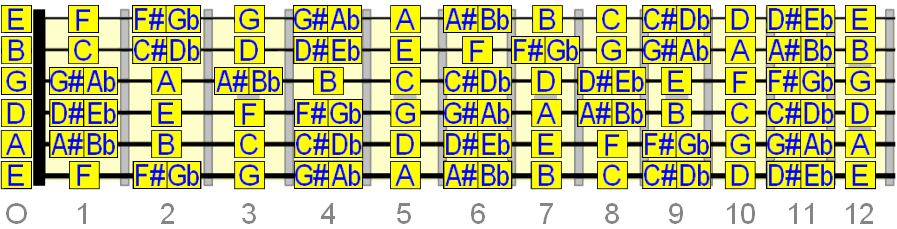
the guitar. If you can easily find the notes on the fifth and sixth
strings of the guitar then all it takes is a bit of practice with the
CAGED system and you will be able to find any major chord tone very
easily anywhere on the neck. There are two main things you need to
learn. The first is the order of the chords always remains in the same
sequence C A G E D starting from the C or if you were starting from the G
then the order would be G E D C A because after the D chord it starts
over again from the C. This makes more sense when you can see it in
diagram form as shown below.
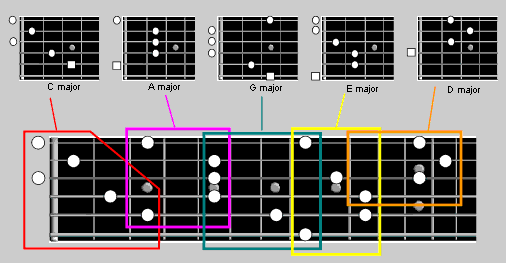
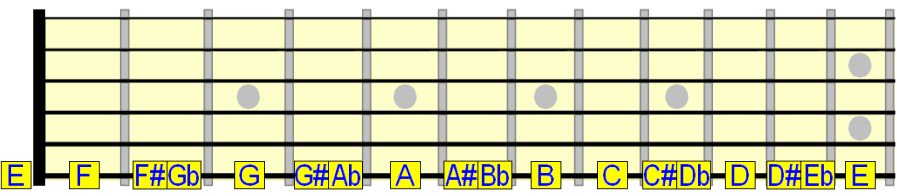
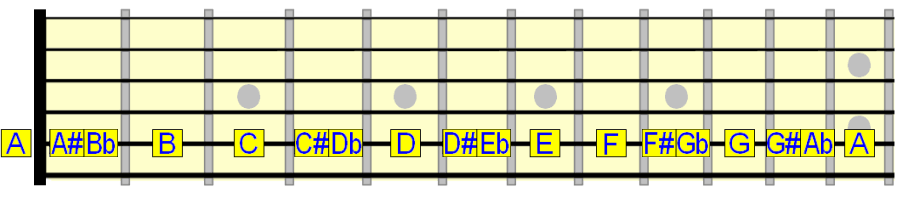
Study the picture above and note how the five chord
patterns overlap with each other. Once you get used to visualising the
CAGED chords across the neck like this you will find chord tones very
easy. Don’t forget the order stays the same, G will always overlap with E
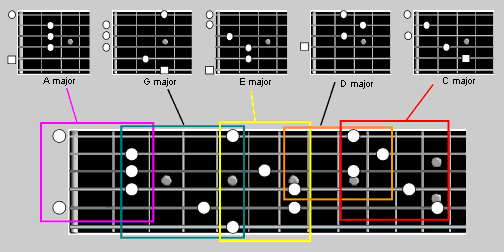
etc. The next picture shows the same CAGED sequence starting from a
different place to give you the idea.
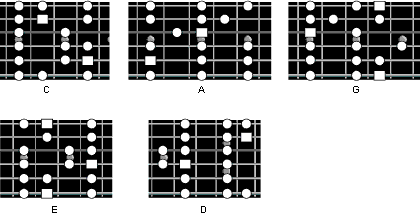
The CAGED system also helps us with playing the major
scales. As you have seen in the example above it’s quite easy to get
used to the finding the chord tones anywhere on the neck as long as you
can quickly find the root notes on the guitar strings. When you learn
the major scale positions for the guitar it is a lot to have to
remember. This gets even harder when you have to think about these
positions in twelve different keys. By combining the major scales with
the CAGED sequence of chords this task becomes much easier. By getting
used to the relationship between the chords and the scales you will
start to realise that remembering these scale positions and being able
to find them in any key becomes a lot easier. Study the diagrams below
and practice playing with these chord shapes and scales across the
fretboard. It might seem a lot of work at first but you will get used to
it quite quickly. The CAGED guitar system is a great method to help you
find your way around the neck so keep at it and in a few months you
should playing the guitar without thinking.
source article : http://www.cagedguitarsystem.net/


 Many years ago I bought a guitar exercise book written by Al Di
Meola. The first two things he pointed out in the book was the
importance of creating good habits and taking care of your health. I
never forgot those two golden rules, although taking care of my health
was something I had to learn the hard way. It took me a while to learn
the major benefits of living a healthy life.
Many years ago I bought a guitar exercise book written by Al Di
Meola. The first two things he pointed out in the book was the
importance of creating good habits and taking care of your health. I
never forgot those two golden rules, although taking care of my health
was something I had to learn the hard way. It took me a while to learn
the major benefits of living a healthy life.


